Craftsman C950 Series Snowblower Manual: A Comprehensive Guide
This manual offers detailed instructions for assembly, operation, and maintenance of Craftsman C950 snowblowers, including models like 536.88614 and those utilizing part 621450x79D.
The Craftsman C950 Series snowblowers represent a robust line of machines designed to tackle a wide range of winter weather conditions. These models, including the 536.88614, are known for their durability and efficient snow removal capabilities. This manual serves as a comprehensive resource for owners, providing detailed guidance on everything from initial setup to advanced troubleshooting.
Whether you’re a seasoned snow removal professional or a homeowner preparing for the first snowfall of the season, understanding your snowblower is crucial for safe and effective operation. This guide will walk you through the specific features of the C950 series, ensuring you can maximize its performance and longevity. Information regarding attaching snowplows and proper operating speeds is also covered, alongside lubrication schedules for optimal maintenance. Detailed parts information, like that found for the 621450x79D model, will aid in repairs and upkeep.
Understanding Your Snowblower Model
The Craftsman C950 Series encompasses various configurations, but all share core components designed for powerful snow clearing. Familiarizing yourself with these elements is paramount before operation. Key areas include the auger and impeller system – crucial for picking up and throwing snow – and the drive system, which provides forward and reverse motion.
Specific models, such as the 536.88614 and those utilizing parts like 621450x79D, may have slight variations in features or design. This manual provides detailed diagrams and parts lists to help you identify the specific components of your machine. Understanding part numbers is essential when ordering replacements or performing maintenance. Pay close attention to the snow thrower’s stage (single or two-stage) as this impacts its capabilities and operation. Proper assembly, as detailed in accompanying instructions, is vital for optimal performance and safety.
Safety First: Operating Procedures
Prioritize safety by thoroughly reviewing all operating procedures before using your Craftsman C950 snowblower; understand emergency stops and pre-operation checks.
Pre-Operation Safety Checks
Before each use, a meticulous pre-operation safety check is crucial for preventing accidents and ensuring optimal performance of your Craftsman C950 snowblower. Begin by visually inspecting the auger and impeller, confirming they are free from obstructions and damage.
Verify all nuts and bolts are securely tightened, paying close attention to those on the auger housing and scraper bar. Check the oil level, ensuring it’s at the recommended fill line – insufficient lubrication can cause significant engine damage.
Inspect the fuel lines for leaks or cracks, and confirm the fuel shut-off valve is in the correct position. Examine the shear pins; having spares readily available is advisable, as they are designed to break under stress, protecting the gearbox.
Finally, ensure the control levers operate smoothly and that the discharge chute is functioning correctly. Never operate the snowblower with missing or damaged parts.
Safe Operating Practices
Prioritize safety during operation of your Craftsman C950 snowblower. Always clear the work area of children, pets, and obstacles before starting. Never allow anyone to stand in front of the machine. Maintain a firm grip on the controls and walk at a comfortable pace – avoid rushing.
Be mindful of the discharge direction and ensure it’s aimed away from people, property, and roadways. Avoid throwing snow onto streets or public rights-of-way. When operating on slopes, proceed cautiously and traverse across the incline, not up and down.
Never attempt to clear a clogged chute with your hands; always use a clean-out tool. Avoid operating the snowblower in darkness or poor visibility without adequate lighting. Regularly monitor the engine for unusual noises or vibrations, and stop immediately if anything seems amiss.
Emergency Shutdown Procedures
In any emergency situation, immediate shutdown of your Craftsman C950 snowblower is crucial. The primary method is to release the handlebar controls; this is designed to instantly stop the auger and impeller. Familiarize yourself with the location and operation of the engine switch – use it to completely shut down the engine if the handlebar release fails.
If an object becomes lodged in the auger or impeller, immediately shut down the engine before attempting any removal. Never reach into the chute while the engine is running. Ensure the shear pins are functioning correctly to prevent damage and potential hazards.
Regularly inspect the machine for any signs of damage or malfunction. If you encounter a situation you cannot safely resolve, contact a qualified service technician. Prioritize your safety and the safety of others at all times.

Assembly and Initial Setup
Proper assembly is vital for safe operation. This section details unboxing, component identification, handle attachment, and auger/impeller installation for your Craftsman C950.
Unboxing and Component Identification
Carefully unpack your Craftsman C950 Series snowblower, ensuring all components are present before discarding the packaging. Refer to the parts list included within the box to verify you have received everything necessary for assembly. Key components typically include: the main snowblower unit, the auger housing, the auger itself, the impeller, the handle assembly (often in multiple parts), control levers, shear pins, and various hardware like bolts, nuts, and washers.
Inspect each part for any shipping damage. If damage is found, immediately contact the retailer or Craftsman customer support. Familiarize yourself with the names and functions of each component. The auger is the rotating spiral that collects snow, while the impeller throws it out of the discharge chute. The handle assembly provides steering and control. Proper identification now will simplify the assembly process and ensure you understand how each part contributes to the snowblower’s operation. Keep the manual handy during unboxing for quick reference.
Handle and Control Assembly
Begin the handle assembly by attaching the lower handle section to the snowblower’s chassis using the provided bolts and washers. Ensure a secure fit, tightening the bolts firmly but not over-tightening. Next, connect the upper handle section, often requiring the installation of control levers for speed and chute direction. These levers are crucial for operating the snowblower effectively.
Pay close attention to the routing of control cables during assembly, ensuring they move freely without obstruction. Incorrect cable routing can hinder operation. Once the handle is fully assembled, verify that all controls are easily accessible and responsive. Proper handle and control assembly is vital for comfortable and safe operation. Double-check all connections before proceeding to the next step. A well-assembled handle provides optimal control and maneuverability during snow removal.
Auger and Impeller Installation
Carefully unpack the auger and impeller components, inspecting them for any shipping damage. Refer to the parts diagram (potentially utilizing part number 621450x79D for reference) to ensure you have all necessary pieces. Begin by sliding the auger into the auger housing, aligning the keyways correctly. Secure it with the retaining pin, verifying it’s fully seated.
Next, position the impeller onto the auger shaft, ensuring proper alignment with the shear pins. These shear pins are designed to protect the snowblower from damage during encounters with obstructions. Install the impeller retaining hardware, tightening to the manufacturer’s specified torque. Always replace damaged shear pins with identical replacements. Confirm the auger and impeller rotate freely before proceeding. Incorrect installation can lead to operational issues and potential damage.
Operating Instructions
Before starting, ensure the area is clear and safe. Familiarize yourself with controls for adjusting throwing distance and speed, optimizing performance in varied snow conditions;
Starting the Engine
Before attempting to start the Craftsman C950 series snowblower, several crucial steps must be followed to ensure safe and efficient operation. First, verify the fuel tank contains fresh gasoline, and the oil level is within the recommended range. Ensure the spark plug wire is securely connected.
Engage the bail lever located on the handle, holding it firmly against the handle. Simultaneously, prime the engine by pressing the primer bulb several times – typically 3-5 pumps – until fuel is visible. Next, set the choke lever to the ‘CHOKE’ position, especially in cold weather.

Now, firmly pull the starter rope with a smooth, controlled motion. Avoid jerking the rope, as this can damage the starter mechanism. Once the engine sputters or attempts to start, gradually move the choke lever to the ‘RUN’ position. Continue pulling the starter rope until the engine runs smoothly.
Allow the engine to warm up for a few minutes before engaging the auger and drive system. This ensures proper lubrication and optimal performance.
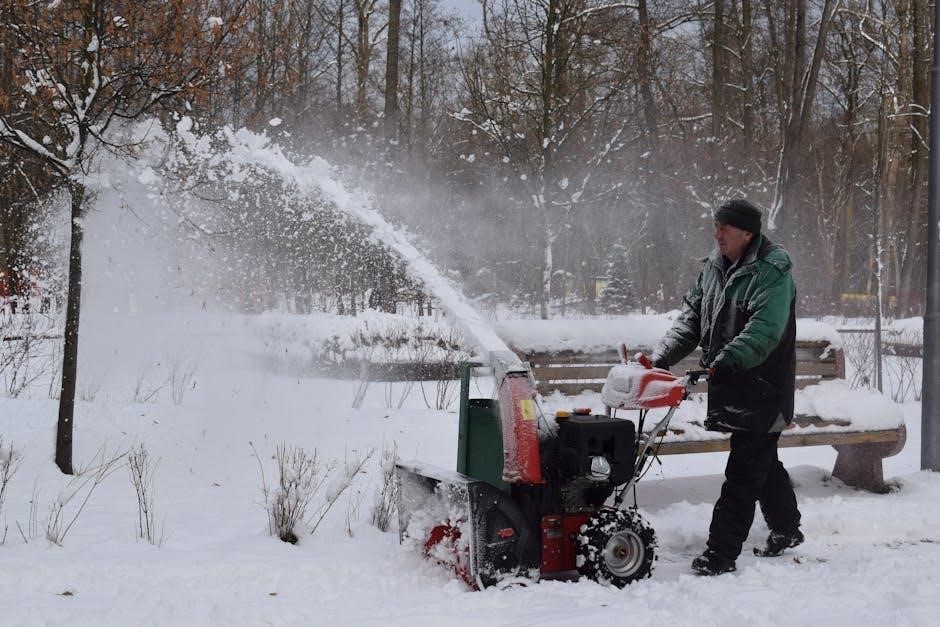
Adjusting Snow Throwing Distance and Angle
The Craftsman C950 series snowblower offers adjustable features to optimize snow removal based on conditions and user preference. Distance is primarily controlled by the speed at which you propel the machine forward; slower speeds result in greater throwing distance.
The discharge chute angle is adjusted using the chute rotation lever, typically located on the handle. This lever allows you to direct the snow stream left or right, avoiding obstacles or directing snow away from driveways and walkways.
For increased throwing distance, ensure the deflector is properly positioned. Adjusting the deflector’s height and angle influences the snow’s trajectory. Experiment with different settings to find the optimal configuration for your specific snow type and wind conditions.
Remember to avoid aiming the snow stream towards people, animals, or property. Always be mindful of the surrounding environment when adjusting the throwing distance and angle.
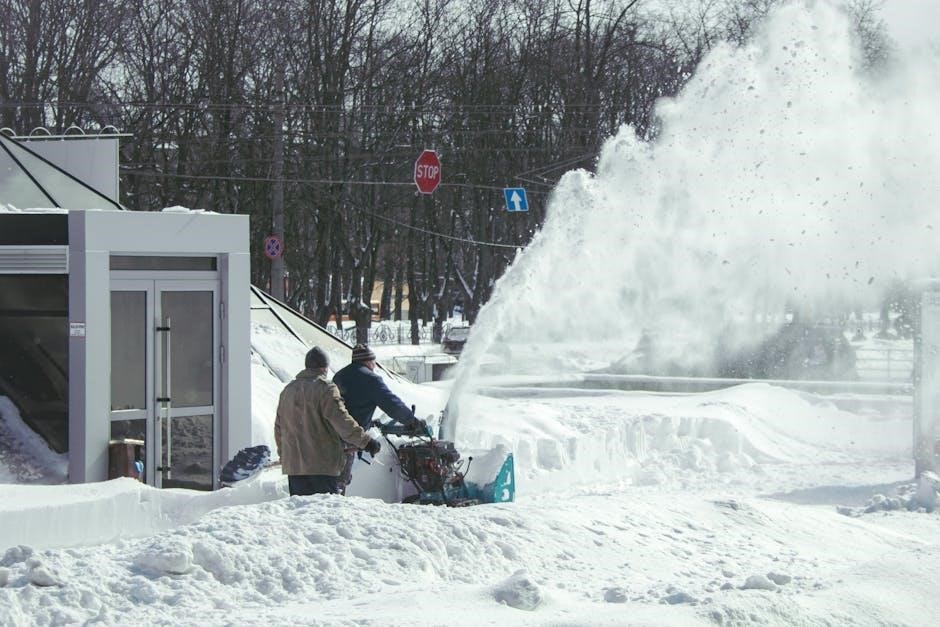
Navigating Different Snow Conditions
The Craftsman C950 series snowblower is designed to handle a variety of snow conditions, but adjustments may be necessary for optimal performance. For light, fluffy snow, a faster operating speed is generally effective. However, with heavy, wet snow, reducing speed and potentially making multiple passes is recommended.
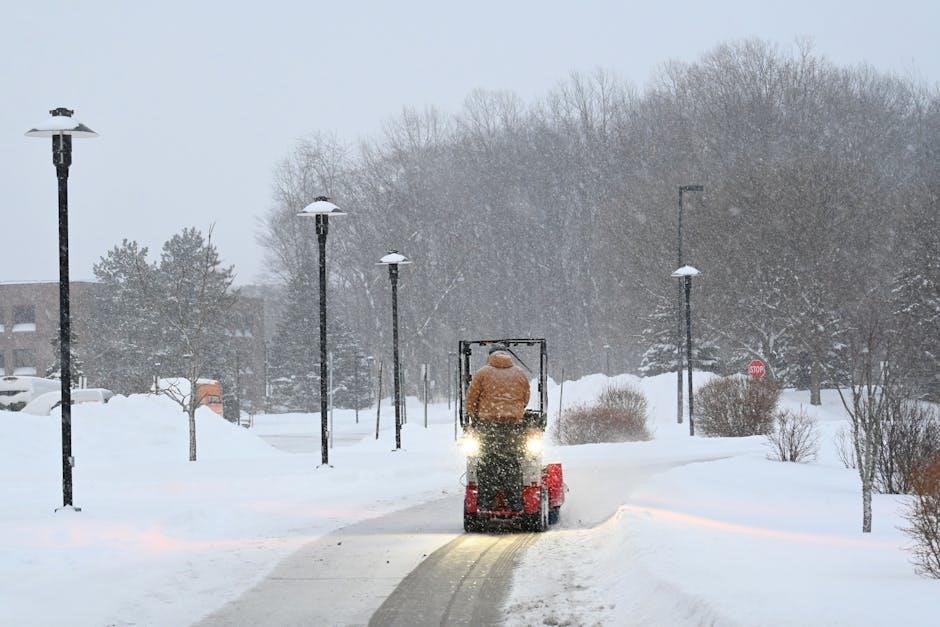
When encountering drifts, approach them head-on at a slower pace. Utilizing the two-stage auger system, the C950 can effectively break through packed snow. Avoid attempting to force the machine through excessively large drifts, as this can strain the engine and potentially cause damage.
For icy patches, be cautious and maintain control. Reducing speed and ensuring a firm grip on the handle are crucial. The snowblower’s tires provide traction, but icy conditions can reduce grip.
Regularly clearing the discharge chute prevents clogging, especially with wet snow. Maintaining proper machine speed based on snow density ensures efficient operation.

Maintenance and Troubleshooting
Consistent upkeep, including oil changes and shear pin checks (like part 621450x79D), ensures peak performance and extends the lifespan of your Craftsman C950 snowblower.
Regular Maintenance Schedule
Maintaining your Craftsman C950 series snowblower is crucial for reliable operation. Before each use, inspect the auger and impeller for damage, and verify all bolts are tightened securely. After every five hours of operation, or at the beginning of each season, check the engine oil level and add if necessary – refer to your engine’s specific oil requirements.
Lubricate moving parts, including the auger gearbox and drive chain, according to the lubrication schedule detailed in the full owner’s manual. Regularly inspect the shear pins (such as those referenced in part number 621450x79D) and keep replacements on hand. A thorough inspection of the drive system should be performed annually, checking belts for wear and tear.
Finally, clean the snowblower after each use to prevent corrosion and ensure optimal performance. Store the unit in a dry location, protected from the elements, when not in use. Following this schedule will help maximize the life of your snowblower.
Oil Change Procedures
Regular oil changes are vital for the longevity of your Craftsman C950 snowblower’s engine. Before beginning, ensure the engine is warm, but not hot, and disconnect the spark plug wire for safety. Locate the oil drain plug, typically found on the lower part of the engine. Position a suitable oil drain pan beneath the plug and carefully remove it, allowing the old oil to drain completely.
Once drained, replace the drain plug and tighten it securely. Locate the oil fill cap and, using a funnel, slowly pour in the recommended amount of oil – consult your owner’s manual for the correct type and quantity. Avoid overfilling.
After filling, check the oil level with the dipstick, adding more if needed. Reconnect the spark plug wire. Properly dispose of the used oil at a designated recycling center. Maintaining proper oil levels, as part of the overall maintenance of models like 536.88614, ensures smooth operation.
Shear Pin Replacement
Shear pins are designed to protect the auger and impeller from damage during impacts with hard objects; When a pin shears, the auger stops rotating. Before replacing, always disconnect the spark plug wire! Locate the sheared pin – often near the auger gearbox. Use a punch and hammer to drive out any remaining fragments of the old pin;
Insert the new shear pin, ensuring it’s correctly aligned. Some models may require a cotter pin to secure it. Tighten the cotter pin securely. Important: Use only the specified replacement pin; using a bolt or stronger metal can cause serious damage to the snowblower’s internal components.
Proper shear pin maintenance, crucial for models like the 621450x79D, prevents costly repairs. Keep spare pins on hand, especially during heavy snow seasons, to minimize downtime. Refer to your parts diagram for correct pin identification.

Parts and Diagrams
Accessing detailed parts breakdowns and diagrams is essential for repairs and maintenance, particularly for identifying components like those found in the 621450x79D model.
Locating Parts Diagrams for the C950
Finding the correct parts diagrams for your Craftsman C950 series snowblower is crucial for successful repairs and maintenance. Several online resources offer these diagrams, often requiring your model number for accurate results. Start by visiting the Craftsman website and utilizing their parts lookup tool; inputting your specific model – such as 536.88614 – will narrow down the options.
Alternatively, dedicated parts websites specializing in outdoor power equipment frequently host extensive diagram libraries. These sites often allow searching by model number or even part number (like 621450x79D). Remember that diagrams can vary slightly depending on the year of manufacture, so confirming the production date of your snowblower is beneficial.
Many online forums and communities dedicated to Craftsman products also share links to diagrams and offer assistance in locating specific parts. When searching, be as precise as possible with your model information to ensure you obtain the correct diagram for your C950 snowblower.
Understanding Parts Numbers (e.g., 621450x79D)
Craftsman utilizes a specific numbering system for snowblower parts, crucial for accurate ordering and identification. A typical parts number, such as 621450x79D, isn’t random; it contains coded information about the part itself and its compatibility. The initial digits often indicate the component group – for example, engine parts, auger assembly, or drive system components.
The subsequent numbers specify the particular part within that group, while the ‘x’ typically separates the base part number from revision codes. The letters following the ‘x’ (like ‘79D’ in our example) denote engineering revisions or updates to the original design.
Understanding these revisions is vital; a newer revision might supersede an older one, offering improved durability or functionality. When ordering, always double-check that the parts number matches your snowblower’s specific model (e.g., 536.88614) and year of manufacture to ensure compatibility.
Common Replacement Parts
For Craftsman C950 series snowblowers, certain parts experience wear and tear and require periodic replacement. Shear pins are frequently replaced, protecting the auger and impeller from damage during impacts with hidden obstacles. Scraper bars, which clear snow from the pavement, also wear down and need occasional attention.
Drive belts are susceptible to stretching or cracking over time, impacting the snowblower’s self-propel function. Regularly inspect these belts for signs of damage. Additionally, skid shoes, which maintain the proper clearing height, can wear unevenly and affect snow removal performance.
Depending on the model (like 536.88614) and usage, you might also need to replace the auger bolts, impeller blades, or even components related to the engine. Maintaining a stock of these common replacement parts, alongside your parts diagrams (using numbers like 621450x79D for identification), will minimize downtime during the winter season.
Advanced Troubleshooting
This section details solutions for complex issues, including auger malfunctions, drive system failures, and engine problems found in Craftsman C950 models.
Addressing Auger Issues
Auger problems are common in snowblowers, often stemming from obstructions or damaged shear pins. If the auger isn’t rotating, first ensure the engine is off and the spark plug is disconnected for safety. Carefully inspect the auger housing for any packed snow, ice, or foreign objects like rocks or debris that may be causing a blockage.
A frequently encountered issue involves the shear pins, designed to protect the auger and impeller from damage. If a shear pin breaks (part number often referenced in diagrams like those for 621450x79D models), the auger will stop. Replacement is crucial; do not attempt to bypass this safety feature.
Inspect the auger blades themselves for wear or damage. Bent or severely worn blades reduce efficiency and can contribute to further issues. Finally, check the drive belt connecting the engine to the auger; a worn or broken belt will prevent auger operation. Refer to parts diagrams for correct belt identification and replacement procedures.
Resolving Drive System Problems
Drive system malfunctions hinder snow removal, often manifesting as a lack of self-propel or difficulty maneuvering. Begin by verifying the drive belt’s condition – a cracked, frayed, or broken belt necessitates replacement. Consult parts diagrams (like those associated with model 621450x79D) to ensure you obtain the correct belt.
Check the drive engagement cable for proper adjustment and functionality. If the cable is loose or damaged, the drive system may not engage correctly. Inspect the drive control levers for smooth operation and ensure they are fully engaging the drive mechanism.
Furthermore, examine the axle and wheel hubs for any signs of damage or wear. Worn or damaged components can impede the drive system’s performance. Lubricate all moving parts according to the maintenance schedule outlined in this manual to ensure optimal operation and prevent future issues.
Engine Troubleshooting Guide
Engine issues are common, often stemming from fuel problems or ignition failures. If the engine won’t start, first check the fuel level and ensure the fuel valve is open. Stale fuel can cause starting difficulties; drain and replace it with fresh fuel. Inspect the spark plug for fouling or damage – a faulty spark plug prevents ignition.
Verify the spark plug gap is correct according to the engine specifications. If the engine starts but runs poorly, check the air filter for obstructions. A clogged air filter restricts airflow, impacting engine performance.
Examine the carburetor for debris or blockages, particularly if the engine exhibits erratic idling or stalling. Refer to detailed parts diagrams (such as those for the 621450x79D model) when disassembling components. Always consult a qualified technician for complex engine repairs.